Wednesday, November 25, 2009

A few more shots I took


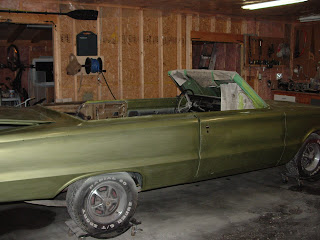
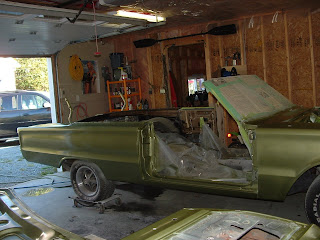
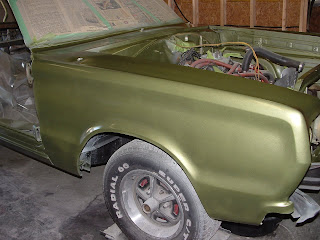
It now needs to be cleaned bad. I have a small residue of compound on it giving it a haze look. I am looking forward to cleaning and waxing it.

Bumper

The bumpers are installed - I just need to pick up three more bolts this week. They will be re-chromed next year. For now I painted them - not too bad for paint hey?

Trim time


The trim has been installed and all glass, mirror, and emblems are also installed now. I also bought and installed new trunk seal as well as new door seals. Almost done. Next - complete the door handles then just a few interior pieces.
I think it will officially be done before the new year.

Tuesday, October 20, 2009

Calling to be driven.


Starting to see her all finished with the top down driving down Lawrencetown beach. Worth the wait for sure.

She is starting to look good.


One more go around with the polishing wheel and the trim and door handles can be installed. Now I want to drive it. Looking forward to that first spring run.

The Houndstooth mat for the trunk.

I was laying it out to flatten it. It was shipped in a roll and is a heavy rubber material. It is custom fit for the trunk.

Carpet goes in.


The new carpet had to be cut to fit. Now I will install the seat belts, side panels and seats. First the door panels will be recovered and the side panels in the rear will be painted green and black to match the car.

Wheels and tires - "Craigers"


I installed the chrome wheels. These really set off that green paint and look great.

Saturday, October 10, 2009

Color Sand and Buff


The drivers side has been wet sanded with 1500 grit then buffed to a high shine with 3M compound and buffing wheel. Next I will move to the passengers side and follow the same procedure. The hood was removed to be repainted as the orange peel would not come out. Painting it while vertical like the body of the car should work better and lay down a better coat. It too will then be color sanded with 1500 and buffed out.

Sunday, October 4, 2009

Buffing out Orange Peel

JP can't wait to drive.

JP pretends to drive the car. He was excited to see it go from a pile of parts to an actual car. What a difference a year makes.

The top goes on.


Yes the time has come to put the top on. This was removed almost exactly a year ago today. Now it needs the year worth of dust cleaned off and the back bolted to the new gutter system in the trunk.

The mechanics, painters and all around Jack of all trades.


JP and Daddy after the front grill was completed. Now the top goes on next.

The headlights are installed

JP installed the headlights. - Thanks for the help little man.

JP helps rebuild the "Green Car"

Rebuild time


We started putting it all back together today. The grill and tail lights are installed. Next we will add the headlights and convertible top.

Wednesday, September 30, 2009

Final coat of paint is complete


Yes it is finally painted completely. I sprayed the final coat after work today and it turned out pretty good for a back yard job. Next I will let harden and smooth it out with a buffing wheel and compound. After that it will be time to wax her.
Notice the pictures are fuzzy - that is because the paint fumes or cloud was still thick in the air when I took the pictures. Excitement of finishing this stage took the better of me I guess.


Sunday, September 27, 2009


Color wet sanding and prep for final paint coat.


The doors, hood and trunk lid are all installed. The entire car is painted and wet sanded to flatten any high spots and remove dirt prior to the final paint coat. Final coat going on this week then I will buff the paint with compound and then wax to bring up the shine.

Tuesday, September 22, 2009

Quarter panel


Yes this is the quarter panel that I totally cut out and re-built from scratch. It turned out great. I was nervous of the paint because it shows any flaws in my body work but I must say it turned out better than I expected. Allot of hours spent shaping this one.

Ready to start re-assembly soon


Engine bay and door jambs are done.


Ready for the doors and lids.


Freashly painted with Tropical Green Metalic. This is the first coat. I have a few dirt spots to deal with before moving onto the next coat. Sanding with 800 grit then repaint and she will be as smooth as glass.

And then she was green.


We have color. Yes I am just a month off my target but the car has it's first coat of the Tropical Green that Justin helped me pick out at the paint store. Not bad for a home job with a 12 gallon 2hp compressor. They said it couldn't be done. ha ha....

Wednesday, July 1, 2009

It is looking like a car again. The hinges were mounted on their new metal and ready for the hood. Good news on the hood - it actually needs nothing but sanding - solid with zero rust, dents or chips. Should go back together easy.


Drivers rear quarter is done and ready for final sanding then paint.


Drivers side fender was installed - needs only a light sanding with 600. Then the door will be prep with putty and primered. I expect to be at paint stage by August.


Just a few low spots on the replacement quarter. Long straight lines are not very forgiving but I am 90% there.


The door was smoothed out too. It was a heck of allot of sanding but it looks great. I am very pleased with the way it turned out. The fender and door are both complete and ready for paint. Final sand was with 600 grit. The rear quarter still needs one more block sanding and it will also be completed. A few more days and I am on the Drivers side.

Body work and rebuild time


It was a busy week. I managed to take advantage of both the weekend and Canada Day to leap frog ahead. The front end was installed, Fender was primered and putty applied, sanded then repeated.

Saturday, June 20, 2009

The quarter gets its first coat of primer - Do we see the light at the end of the tunnel????

The quarter panel has three coats of filler to straighten it out. After two weeks of sanding for an hour here and there I finally sprayed the first coat of primer tonight on the quarter. It will now be block sanded to find low spots and then putty applied where needed. The panel looks wavy in this pic only because it was sprayed lightly with a can. In fact the panel is actually pretty straight already so the next step should be easy.


Filler time

The filler has been applied to both quarters. Three coats and allot of sanding in between and it is ready for primer, block sanding and putty coats.


The rain gutter is now painted on the repair piece to prevent rust. The whole thing will be painted prior to the installation of the interior.

The tail piece is installed - now it gets dusty - time for body filler to smooth the new piece in as well as the quarter panel on the other side.